Introduction:
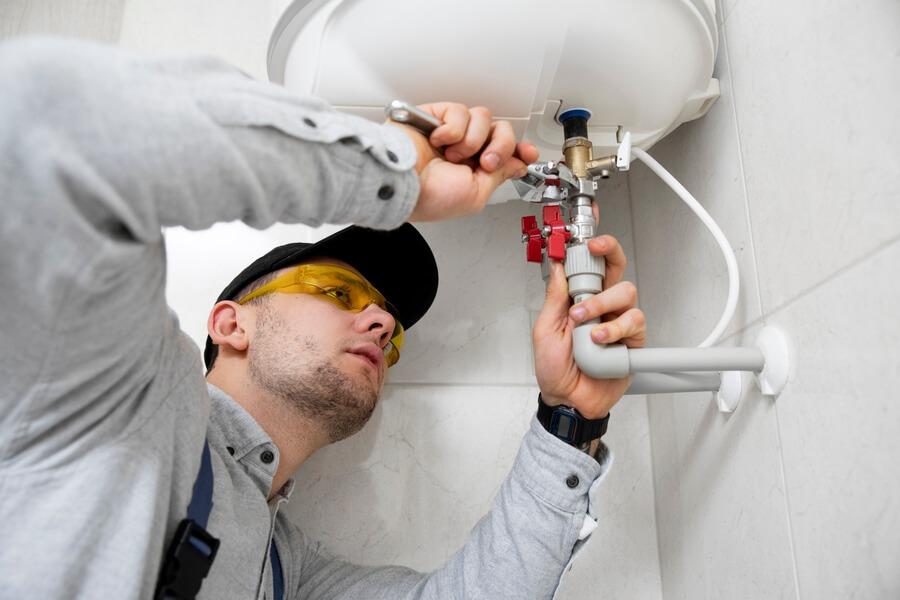
water leaks can transform a tranquil home into a realm of unexpected chaos. The constant drip-drip-drip can disrupt your peace, create unsightly stains, and even jeopardize the structural integrity of your beloved sanctuary. Fortunately, before you call in the professionals, you may discover that tackling a water leak repair can be a manageable—and surprisingly rewarding—DIY project. in this step-by-step guide, we’ll explore the essential tools and techniques you’ll need to identify and fix those pesky leaks with confidence. Whether you’re dealing with a minor faucet drip or a more complex issue behind the walls, join us as we navigate the path to a drier, happier home. Grab your toolkit, and let’s get started!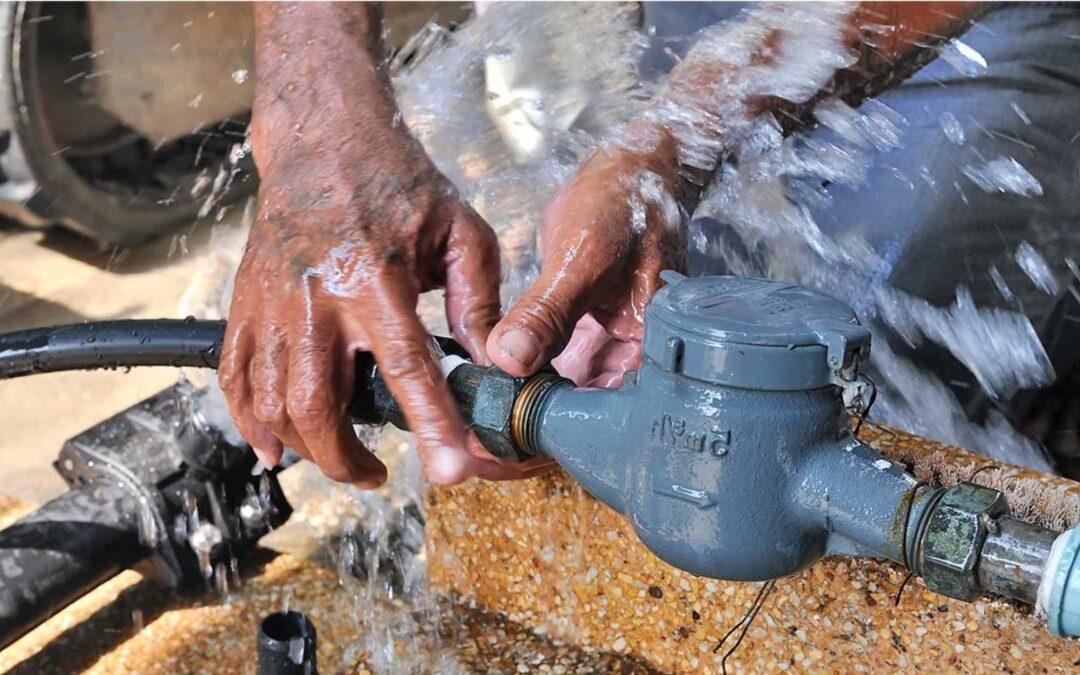
Essential Tools and Materials for DIY Water Leak repair
when preparing to tackle a DIY water leak repair, having the right tools and materials on hand is crucial for a accomplished outcome.each repair scenario can vary in complexity, but there are some basic tools that every homeowner should consider. Begin by gathering the following essential items:
- Adjustable Wrench: Ideal for gripping and turning plumbing nuts and fixtures.
- Pliers: Useful for manipulating small parts and securing connections.
- Screwdrivers: Both flathead and Phillips screwdrivers will be necessary for accessing various fixtures.
- Pipe Cutter: Perfect for making clean cuts in pipes when replacements are needed.
- Tape Measure: Vital for measuring lengths of pipe and ensuring accurate fittings.
In addition to tools, you’ll also need specific repair materials to effectively fix leaks. Depending on the nature of the leak, consider stocking up on the following items:
- Epoxy Putty: A durable solution for sealing small leaks and cracks in pipes.
- Pipe Sealant Tape (Teflon Tape): Essential for ensuring a watertight seal on threaded pipe connections.
- Replacement Washers and O-Rings: Common culprits of leaks in faucets and fixtures,these small components are easy to replace.
- Silicone Caulk: Useful for sealing gaps around fixtures and preventing moisture intrusion.
- New Pipes or Fittings: Always have a few assorted fittings on hand for unexpected repairs.
It’s also wise to have protective gear to safeguard against potential messes and injuries during the repair process. Consider including the following items in your toolkit:
- Gloves: Protect your hands from sharp edges and chemicals.
- Safety Glasses: Shield your eyes from debris and splashes.
- Drop Cloths: Use these to catch any water spills and to protect your work area.
- Bucket: Handy for catching dripping water during repairs and minimizing clean-up.
By equipping yourself with these essential tools and materials, you will not only prepare yourself for various leak situations but also boost your confidence as you navigate through your DIY repair project.
Identifying the Source of the Leak: A Comprehensive Approach
When tackling a water leak, the first step is accurately identifying its source. Leaks can originate from various points in your plumbing system, making a methodical approach essential. Begin by inspecting visible fixtures and appliances such as sinks, toilets, and washing machines. Look for signs of water accumulation, discoloration, or mold, which can indicate a leak. Don’t forget to check your water meter; if the meter continues to run when all appliances are off, you likely have a leak somewhere in the system.
In conjunction with visual inspections, listening for sounds of dripping or rushing water can also pin down the source. Consider the following common areas where leaks may develop:
- Pipe joints and connections: Weak joints may allow water to escape.
- Appliances: Check hoses and connections for washing machines and dishwashers.
- Bathrooms: Toilets, faucets, and showerheads are common culprits.
- Basements: Look for leaks in exposed pipes or from foundations.
If initial inspections are inconclusive, you may need to take a more advanced approach using technology to help pinpoint the leak. Moisture meters can identify wet areas behind walls, while thermal imaging cameras can visualize temperature differences caused by leaks. For persistent issues, consider conducting a pressure test to isolate problem areas and using dye tests for toilets to detect hidden seepages. This comprehensive approach allows you to gain a clear understanding of where the leak originates, enabling controlled and efficient repairs.
| Leak Detection Method | Description | effectiveness |
|---|---|---|
| visual Inspection | Checking for visible signs of water damage. | Moderate |
| Listening | Identifying dripping or rushing sounds. | Moderate |
| moisture Meters | Measuring moisture levels in walls and floors. | High |
| Thermal Imaging | Visualizing temperature differences indicating leaks. | Very High |
| Pressure Testing | Isolating sections of pipe to test integrity. | High |
| Dye Tests | Using colored dye to trace leaks in toilets. | Very High |

Preparing Your Workspace for Effective Repairs
Before diving into repairing a water leak, setting up your workspace is essential for a smooth and effective process.Start by gathering all necessary tools and materials, ensuring they are within arm’s reach. This not only saves you time but also minimizes unnecessary movement that could distract you from your task.here’s a swift list of basic tools and materials you might need:
- Tools: Adjustable wrench, pliers, screwdriver set, utility knife, and a bucket.
- Materials: Pipe sealant, clamps, tape, a sponge, and a towel.
Next,select a suitable location to work.Choose an area that is well-lit and has enough space for you to move comfortably. Consider using a drop cloth to protect the floor from any spills. If you’re working in a bathroom or basement, ensure the area is dry to prevent slips and falls. Keep the environment tidy; a cluttered workspace can lead to mistakes and accidents. Organize your tools and materials so that you can find everything you need without rummaging through piles.
ensure that any hazardous elements, such as electrical connections or sharp objects, are safely out of your way. Consider creating a temporary workspace by setting up a folding table nearby where you can lay out your tools and materials systematically. This institution will help you stay focused and efficient. Here’s a simple checklist to help you prepare:
| Task | Status |
|---|---|
| Gather tools | ✔️ |
| Secure materials | ✔️ |
| Clear workspace | ✔️ |
| Ensure good lighting | ✔️ |
| Protect floors | ✔️ |
Step-by-Step Instructions for Common Leak Repairs
Water leaks can emerge in various locations around your home, from the kitchen sink to the bathroom fixtures.Knowing how to address these issues can save you time and money. The first step in any leak repair is to identify the source of the leak. Check the areas around appliances, pipes, and fixtures for any visible signs of water accumulation or dampness. Use a flashlight to inspect dark or hidden places thoroughly. Once you’ve pinpointed the leak, gather your materials: plumber’s tape, sealant, screwdriver, and wrenches are commonly needed tools.
For a dripping faucet, begin by turning off the water supply under the sink. Use a screwdriver to remove the faucet handle, exposing the internal components. Check for worn washers or O-rings, as these are frequently enough culprits behind the leaks. If either needs replacing, simply remove the damaged part and insert a new one to seal the faucet properly. Reassemble by reversing the disassembly process and cautiously testing for leaks before fully re-engaging the water supply.Remember, a little care during reassembly can prevent future leaks!
When dealing with pipe leaks, it’s essential to act quickly and efficiently. If you discover a leak in a pipe, first shut off the main water supply. Cut out the damaged section of the pipe, being careful to leave a clean edge. If you’re using PVC, apply primer and glue to the ends of the existing pipe and the new section, ensuring a snug fit. For copper pipes, use a torch to solder a new section carefully. Make sure to test your work by slowly turning the water back on and inspecting for any recurring leaks. Creating a table of potential causes and fixes can definitely help you track issues easily.
| Common Leak Causes | Simple Fixes |
|---|---|
| Worn-out washers | Replace with new washers |
| Loose fittings | Tighten connections |
| Corroded pipes | Replace damaged sections |
| Clogged drains | Use a plunger or drain snake |
Sealing Techniques: Choosing the Right Method
When tackling a water leak repair, selecting the appropriate sealing technique can be pivotal to your success.Numerous methods can address leaks, each with its own advantages and applications. To choose the right one, consider factors such as the leak’s location, the material you’re sealing, and the long-term durability required. Here are some popular sealing methods:
- Epoxy Sealants: Ideal for hard surfaces, epoxy forms a durable bond and is resistant to moisture.
- PVC Sealants: Commonly used for plumbing repairs, these sealants offer a flexible solution that adapts to temperature changes.
- Silicone Caulk: Excellent for sealing joints and cracks, silicone is waterproof and remains flexible after curing.
- Foam Sealants: Perfect for filling gaps, foam expands to provide a strong seal, especially in larger openings.
- Hydraulic Cement: For immediate waterproofing of leaks in concrete, hydraulic cement sets quickly under water, making it a reliable choice in emergencies.
Your choice also depends on the size and nature of the leak. For small cracks, a simple silicone caulk might suffice, whereas larger leaks may require more robust solutions like epoxy or hydraulic cement. To help you make an informed decision, consider the following:
| Sealing Method | Best Suited For | Durability |
|---|---|---|
| Epoxy Sealants | Hard surfaces like metal & concrete | Long-lasting |
| PVC Sealants | Plumbing joints | Moderate |
| Silicone Caulk | Bathroom fixtures | flexible |
| foam Sealants | Openings & gaps | Variable |
| Hydraulic Cement | Concrete leaks | Quick-setting |
Once you’ve assessed the leak and selected the appropriate technique, it’s essential to prepare the surface properly. Clean the area thoroughly to remove any debris or moisture, as this will ensure that the sealant adheres effectively. Apply the chosen sealant consistently and allow it to cure according to the manufacturer’s instructions. Remember, whether you’re repairing a single leak or preventing future ones, taking the time to select the right method and apply it correctly can significantly save you from costly repairs down the line. In addition to sealing techniques,always consider preventative maintenance as part of your long-term water leak strategies.
Preventative Measures to Avoid Future Water Leaks
Being proactive in preventing water leaks can save you significant time, money, and stress in the long run.Start by inspecting your plumbing systems regularly. Look for signs such as:
- Moisture around joints and connections
- Unexplained increases in your water bill
- Water stains on walls or ceilings
By detecting issues early on, you can address them before they escalate into larger problems. Schedule inspections at least twice a year to ensure you are not missing any potential issues.
Another effective strategy is to ensure that your home’s gutters and downspouts are functioning properly.Clogged gutters can cause overflow, leading to water damage in your foundation and walls. To maintain your gutters:
- Clean out debris regularly, especially during the fall
- Install gutter guards to prevent clogging
- Ensure downspouts direct water at least three feet away from the foundation
By adopting these simple maintenance tasks, you can mitigate the risk of water-related issues.
For added protection, consider incorporating water leak detection devices into your home. These devices can alert you when they detect moisture or leaks in areas like basements, under sinks, or around appliances. Additionally, investing in smart home technology can provide real-time monitoring. Some options include:
- Smart water meters
- Leak detectors with smartphone alerts
- Automated shut-off valves that activate during a leak
Implementing these technologies not only helps catch leaks promptly but also fosters a more energy-efficient environment.
Q&A
Q&A: Step-by-Step Guide to DIY Water Leak Repair
Q1: Why should I consider repairing a water leak myself?
A: Tackling a water leak on your own can save you money on professional plumbing costs,give you a sense of accomplishment,and allow you to gain valuable DIY skills. Plus, addressing leaks promptly can prevent further water damage to your home and mitigate issues like mold growth.
Q2: What tools and materials do I need for a DIY water leak repair?
A: Equip yourself with a basic toolkit that includes a pipe wrench, pliers, screwdrivers, adjustable wrenches, and a utility knife.Additionally, materials such as plumber’s tape, epoxy putty, flexible sealant, hose clamps, or replacement pipes may come in handy, depending on the leak type.
Q3: How can I locate the source of a water leak?
A: Start by inspecting visible pipes, fixtures, and appliances for any moisture, mold, or discoloration. If the leak isn’t easily accessible or is hidden behind walls, try using methods like listening for dripping sounds or checking your water meter for unusual spikes in usage.
Q4: What are the most common types of water leaks I might encounter?
A: Typical culprits include leaking faucets, toilet tank leaks, broken or loose pipes, and issues with washing machines or dishwashers. Each type may require a different repair technique, making it essential to identify the source accurately.
Q5: Can you walk me through the basic steps to repair a leaking faucet?
A: Absolutely! First, turn off the water supply to the faucet. Next, disassemble the faucet by removing the handle and unscrewing any additional components. Check for worn washers or seals and replace them as needed. Reassemble the faucet, turn the water supply back on, and test for leaks.
Q6: What should I do if the leak is in a pipe?
A: Begin by shutting off the main water supply to prevent flooding. If the pipe is small and the leak is manageable, apply plumber’s tape or a rubber patch secured with a hose clamp. For larger issues, you may need to cut out the damaged section and replace it with a new piece. Always ensure that the area is dry before sealing or repairing.
Q7: Are there any repairs I should avoid doing myself?
A: While many leaks can be effectively managed with a DIY approach, you should steer clear of major plumbing renovations or issues that could indicate larger problems, such as sewer line leaks or extensive water damage. In those cases, it’s best to consult a licensed plumber.
Q8: how can I prevent future leaks in my home?
A: Regular maintenance is key! Check pipes and appliances periodically, look for signs of wear, and be proactive about plumbing issues.Insulating pipes,especially in colder whether,can also help protect against leaks caused by freezing.
Q9: Is it important to document my repair attempts?
A: Yes, maintaining a record of repairs can be beneficial.Documentation can help track recurring issues, provide useful information for future repairs, and serve as proof for warranties or home insurance claims if needed.
Q10: When should I call a professional rather of attempting a repair myself?
A: If you feel overwhelmed, the repair seems beyond your skills, or the leak is significant and persistent, it’s wise to call in a professional plumber. They can quickly diagnose and address complex issues, ensuring your home is safe and water damage is minimized.
—
Feel free to follow this Q&A for practical tips and tricks to confidently navigate your own water leak repairs! Happy fixing!
To Conclude
tackling a water leak can seem daunting at first, but with the right tools and techniques at your disposal, it transforms into a manageable DIY project. By following our step-by-step guide, you not only enhance your skills but also contribute to a healthier, more lasting home environment. Remember, every drip you fix not only saves water but also protects your living space from potential damage in the future. So, gather your supplies, commit to the task, and take pride in your newfound ability to safeguard your home. Happy repairing!